Creating Salary Payments
Once you have uploaded your payroll data, ExpensePlus will generate your payroll payments for you at the click of a button.
These are then processed via the same brilliant approvals and payments process flow within ExpensePlus alongside other expenses and payments.
As part of the process flow you get to specify any salary splits, and ExpensePlus will do everything else needed. There is no need to enter payroll journal transactions.
Creating Salary Payments
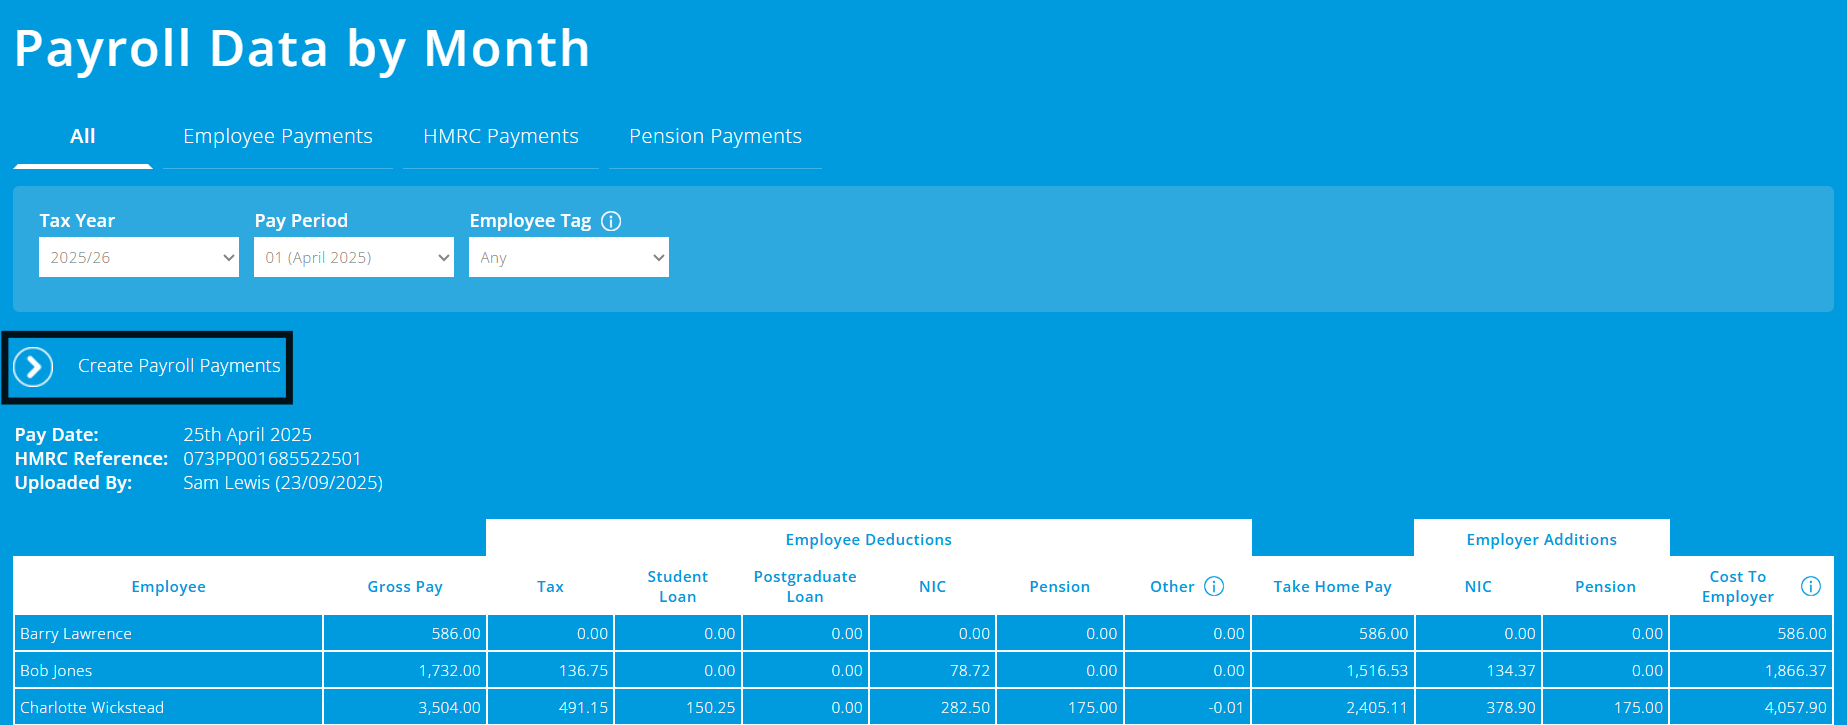
(1) Select the 'Create Payroll Payments' button from within the Payroll Data by Month screen
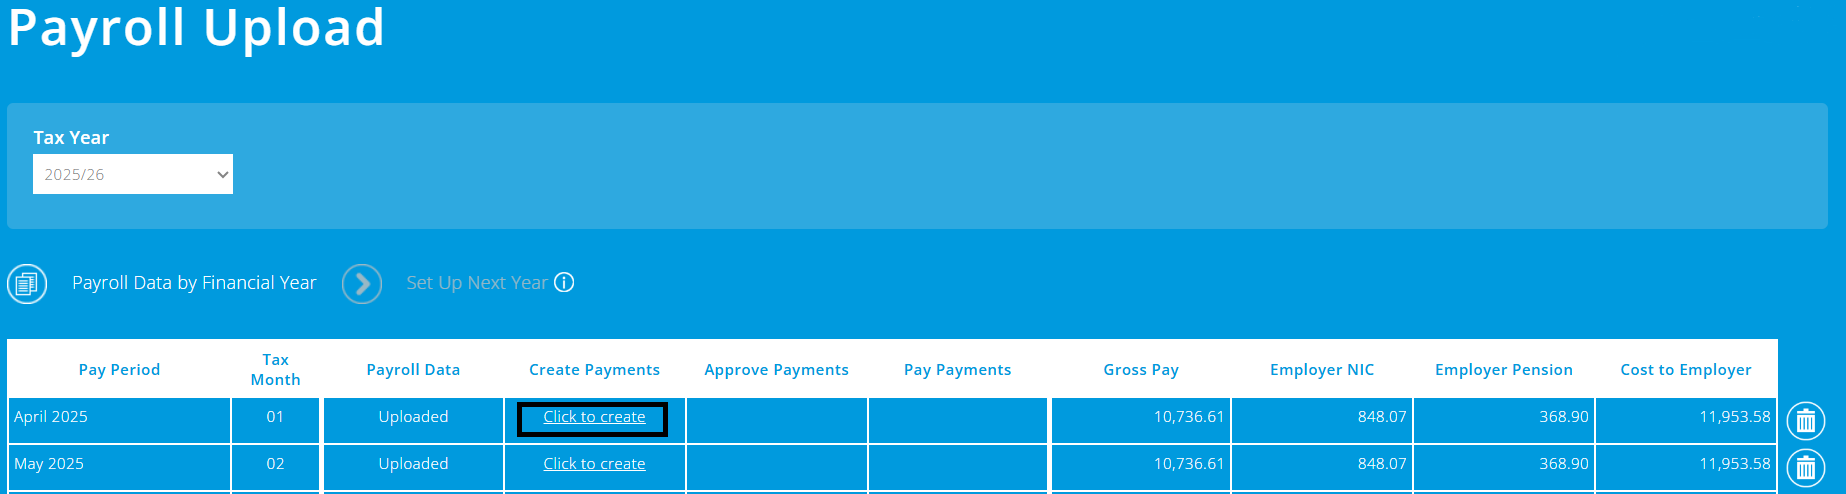
...or from the Payroll Upload screen.
(2) Check you are happy with where payroll amounts for each employee are being recorded to and enter any salary splits.
- To add/edit the fund/categories an employee's employment costs are allocated to, just click on the row to update it.
- To add a salary split, click the '+' button to the right-hand side of the row
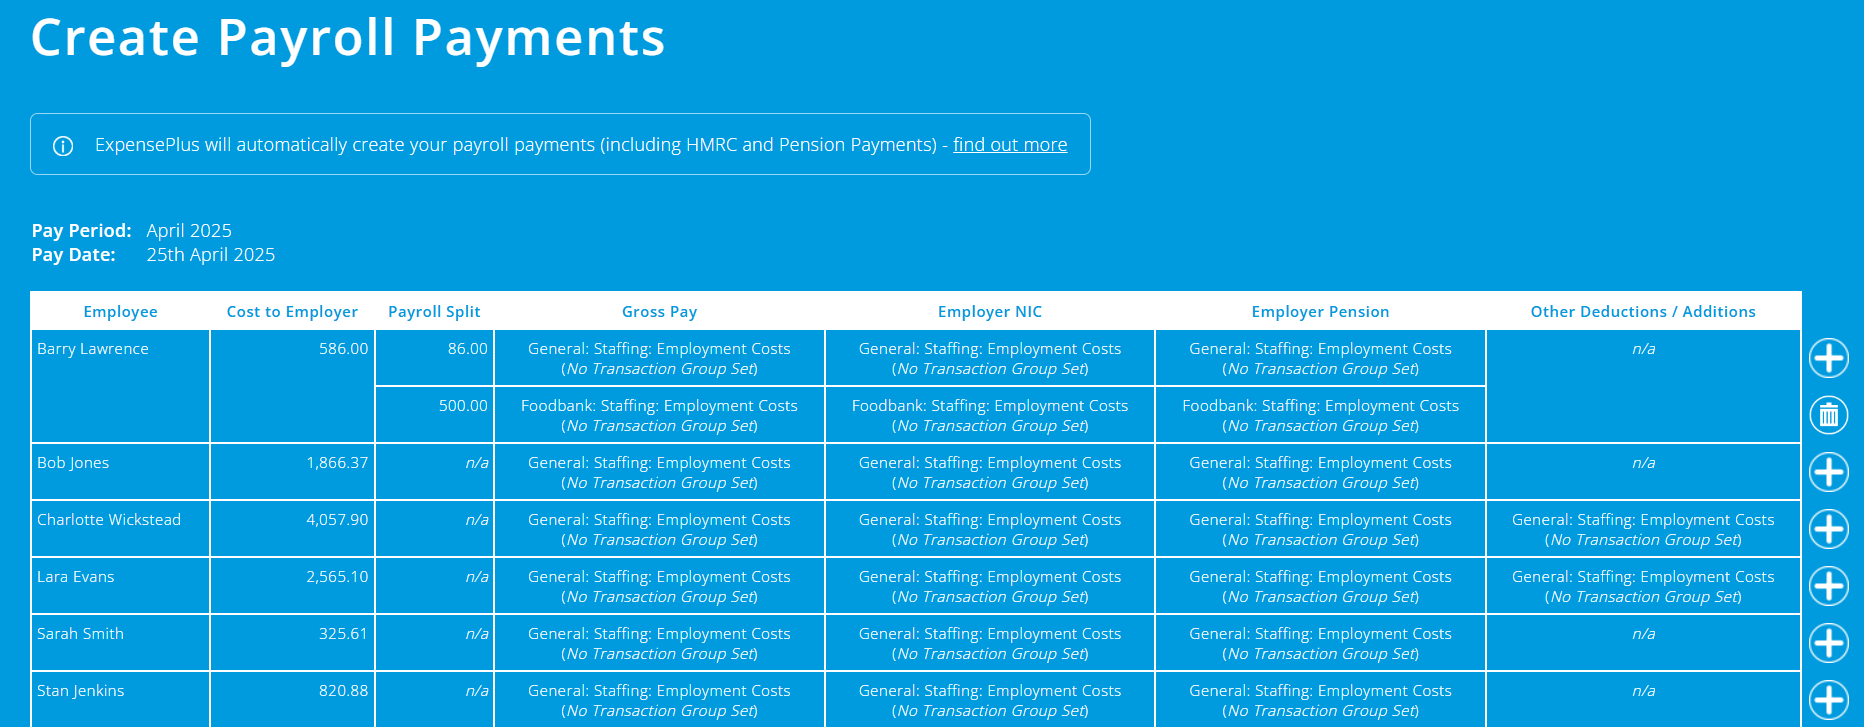
It is not a requirement to split 'Gross Pay', 'Employer NIC' and 'Employer Pension' to separate categories (but many organisations do). Alternatively, you could record all three elements of payroll to just one 'Employment Costs' category, or you might breakdown the categories according to by person or by team. How you structure your categories is up to you and should be dependent on how you wish to view expenditure relating to employment costs.
Additional notes:
- If you have transaction groups enabled, you will also be able allocate/split employment costs to transaction groups as required.
- If you make any salary deductions, for example, for an employee bike to work scheme, a bus pass deduction, or for payroll giving etc., then you will need to set a fund/category for this too in the 'Other Deductions' column and should allocate any paid out amounts related to this deduction against this same category.
(3) When you are happy, click 'Submit' and ExpensePlus will create salary payments based on your payroll settings.
ExpensePlus is able to generate payroll transactions correctly whether:
- Your organisation makes individual salary payments to staff then separate payments to HMRC and to your pension provider(s), OR
- You organisation makes a lump sum payment to your payroll provider who then makes salary payments.
ExpensePlus will remember the allocation you set for future pay periods. Where you have split an employee's salary, the first element of this will be considered as the 'flexible' part, so if the cost to the employer increases/decreases in future pay periods, it's this element that will increase/decrease accordingly (however you can always update this).
A yellow bar message will confirm the creation of the salary payments, which you can view on the view payments screen below. Click on a payroll payment if you wish to view it.

ExpensePlus automatically allocates payroll payments to the correct fund/categories, removing the need to enter complicated journal transactions as required in other accounting software.
If you create accounts on an accruals basis and have auto-accruals enabled, ExpensePlus will automatically accrue all salary payments to the correct pay period (even if payments don't leave your bank until the following month).
Processing Payroll Payments
The payroll payments that ExpensePlus generates are processed via the same brilliant approvals and payments process flow within ExpensePlus alongside other expenses and payments.
Salary Payments
Salary payments to employees do not require receipts, so when they are created, they will appear within the approvals screen (unless you have disabled approvals for salary payments within system settings).
Once approved (or if approvals for salary payments are disabled), salary payments will move through to the payments screen.
The 'due date' for salary payments is automatically set to be the pay date for the pay period the salary payments relate to.
Once salary payments are setup, and marked as paid, they will move through to the bank matching screen as per the usual process flow for all payments.
Salary payments aren't grouped with other payments for payees e.g. if an employee also has an expense claim ready to be paid, these won't automatically be grouped together.
Direct Debits
Direct debits don't require approval or payment, so if you pay HMRC or your pension provider by direct debit, then when payroll payments are created, these direct debits will appear on the right-hand table of the bank matching screen (as per the usual process flow for direct debits).
This is also the case if you make lump sum payments to a payroll provider (rather than making individual salary payments), and where you have specified within payroll settings that this payment to your payroll provider is via direct debit.
Invoice Payments
Invoice payments require receipt, then approval then payment. Consequently, if you pay HMRC via bank transfer, then when payroll payments are created, the invoice to pay to HMRC will appear on the receipt screen within ExpensePlus (as per the usual process flow for invoices to pay).
This is also the case if you make lump sum payments to a payroll provider (rather than making individual salary payments), and where you have specified within payroll settings that this payment to your payroll provider is via invoice payment.
Within the View Payroll Data screen, select the pay period, click 'view payroll payments'. Click on the payment you wish to view, then hover over the status icons in the top right of the purchase to view where the purchase is up to in the process flow.
Reconciling Payroll Payments
Reconciling payroll payments is no different to the reconciliation of all other purchases.
Once you have uploaded bank transactions, these will appear on the left-hand table of the match transactions screen.
Select the payroll transaction you wish to match, and if payroll transactions have been processed correctly, this will go green and auto-match with the corresponding payment on the right-hand table.
You can then select the 'confirm' button' to confirm the match.
Find out more about bank reconciliation
To help you better understand the Payroll module as a whole, please visit the module overview page.