Bulk creating invoices
Bulk creating invoices is a quick and easy way to raise multiple invoices and save yourself time. It is particularly useful for churches or charities that regularly invoice multiple customers for the same product or service. For example, renting a hall to multiple customers throughout a month at a set price.
In this article:
How to bulk create invoices
There are two ways to bulk create invoices within ExpensePlus:
- from Template
- by Copying Existing Invoice(s).

Bulk creating invoices from Template
You can bulk create invoices using any saved invoice templates you have created in ExpensePlus. After you've selected 'Create from Template', the pop-up will give you the option to bulk create multiple invoices.

Use the tick boxes on the left-hand side to select the customers you want to create invoices for.
You can filter customers by Customer Tags, for example to select all customers who hire meeting room 'A' on a regular basis, and bulk create invoices for all of them.

Once you have selected which customers to invoice, select the invoice template you want to use, select an invoice date, and click 'Confirm'.

These invoices will then appear in your Invoicing screen, ready to be sent to the customer. To email the invoices to the customer, click the 'email invoice' button (envelope icon) on the right-hand side next to the invoice.

Bulk creating invoices from Copy Existing Invoice(s)
You can also bulk create invoices using existing invoices that you have created in ExpensePlus. After you've selected 'Copy Existing Invoice(s)', select the invoices you wish to copy using the tick box on the left-hand side.


This is useful if you have repeat customers that have unique invoices, e.g. a Parent Teacher Association that hires a room for their monthly PTA meetings, but at a discounted rate not applied to other customers.
Select 'Confirm', then in the pop-up enter the invoice date for these invoices.

When you click 'Confirm', these invoices will be bulk-created and will appear in your Invoicing screen, ready to be sent to the customer. To email the invoices to the customer, click the 'email invoice' button (envelope icon) on the right-hand side next to the invoice.
Bulk sending invoices
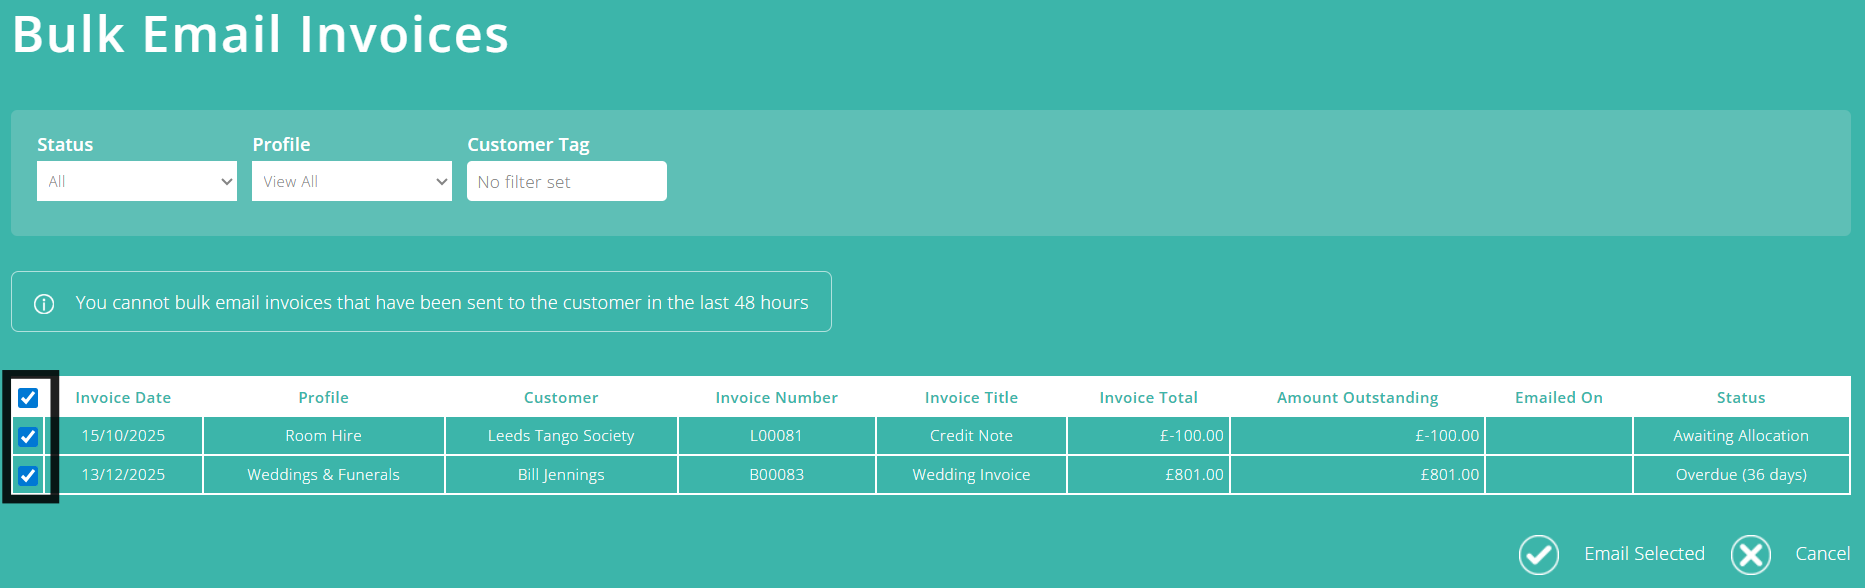
You can bulk email your outstanding invoices too, using the 'Bulk Email Invoices' button.
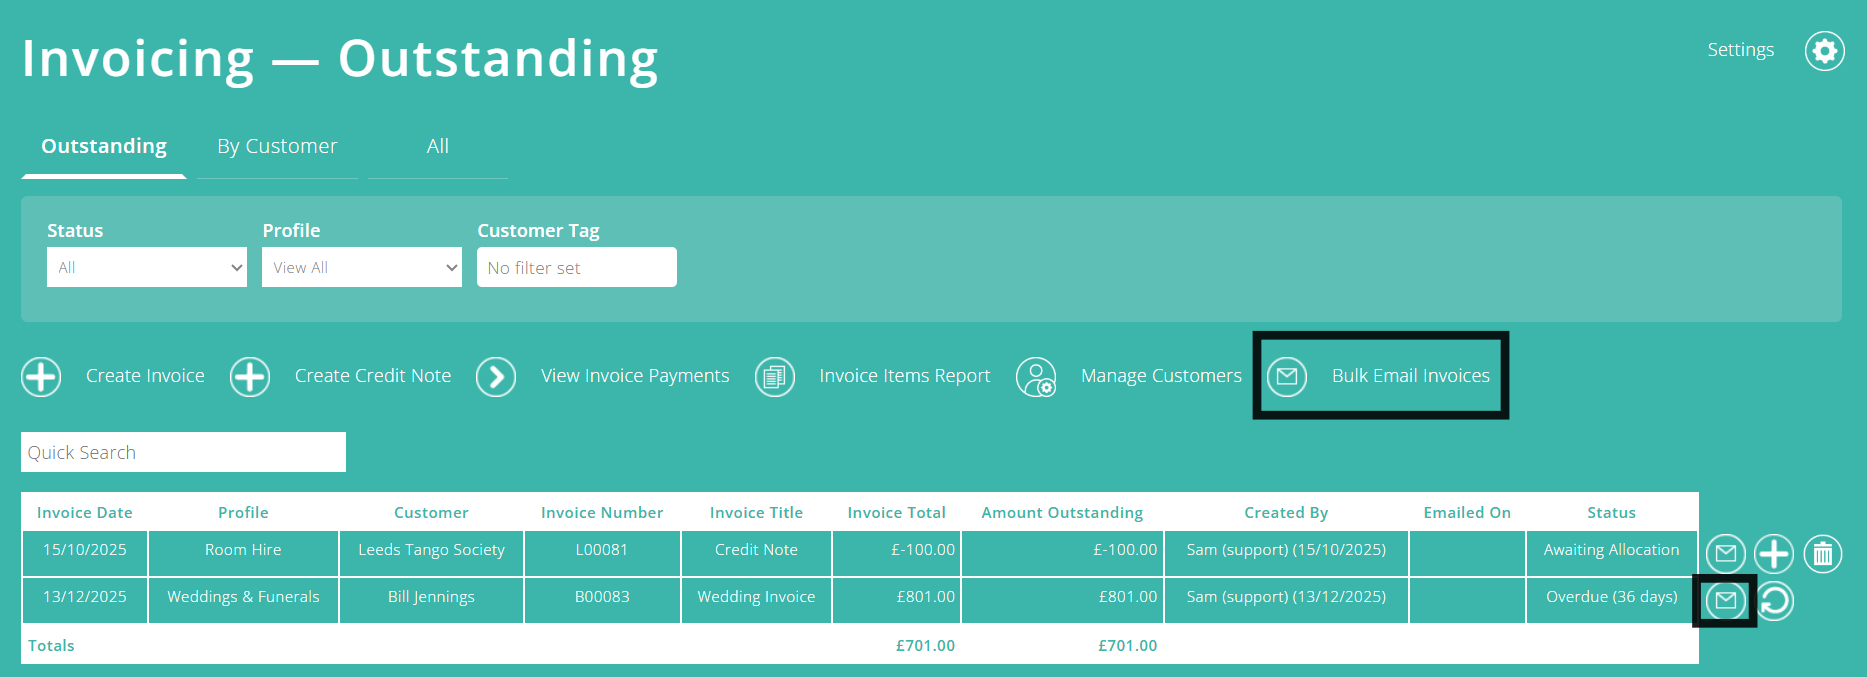
This will allow you to select, using the checkbox, which invoices you wish to send.
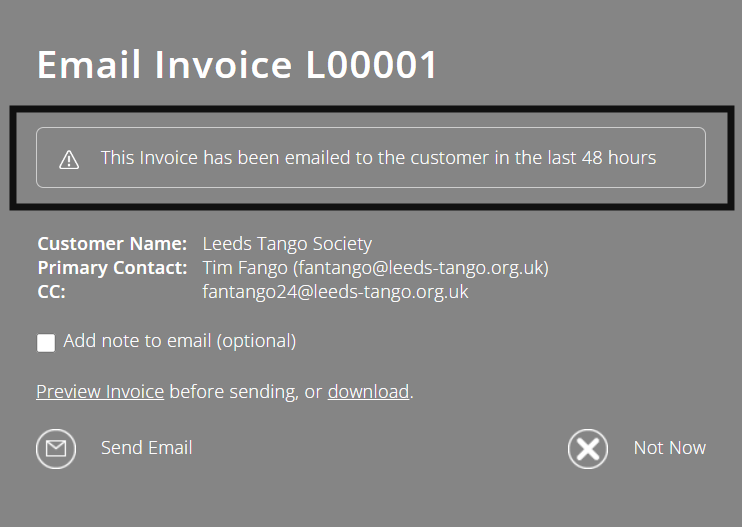
The 'Emailed On' column will display if/when the customer was previously sent the invoice, and any subsequent dates that the invoice was re-sent.
ExpensePlus will highlight if an invoice has been sent or re-sent within the last 48 hours, to help avoid contacting the customer multiple times in quick succession when not intended. You can still send the invoice when you see this warning if required.
To help you better understand the Invoicing Module, please visit the Invoicing Module Overview page.