How can I split a payment that is showing on the payments screen?
Where there are a number of purchases to be paid to the same payee, ExpensePlus automatically combines these into one payment. This article explains how to split out a combined payment into separate payments - for example if you want to pay them on different dates, or from different bank accounts.
In this article:
What's the benefit of combining payee payments?
Combining payee payments into a single payment has a number of benefits:
- It helps reduce the number of payments that need to be made.
- It saves the person submitting the expenses from having to manually add up receipt amounts.
- It saves the person making the payments from having to manually add up purchase amounts.
However, there may be occasions when you want to split out payments that have been combined, for example if you want to pay them on different dates, or from different bank accounts.
The method below allows you to pay just one part of an expense claim when multiple claims have been grouped together into one payment.
Some payments aren't combined - for example invoice payments to the same supplier. Learn more about this in our Help Guide article, Some of my payments aren't combining in the payment screen. How can I resolve this?
Splitting a payment
- In the 'Payments to Set Up' section of the Payments screen, click the tick to the right of the payment group as if marking the purchase as paid.

- You will then see a pop-up where you can untick any purchases that you do not want to pay in this payment.

There's a separate help guide article if you are trying to retrospectively import and reconcile transactions.
We highly recommend you use the expenses and payments process in ExpensePlus. Making payments only when they are showing as ready to be paid on the Payments screen will:
- save you time;
- make processing of purchases simpler;
- avoid the risk of making duplicate payments.
Making payments from multiple bank accounts
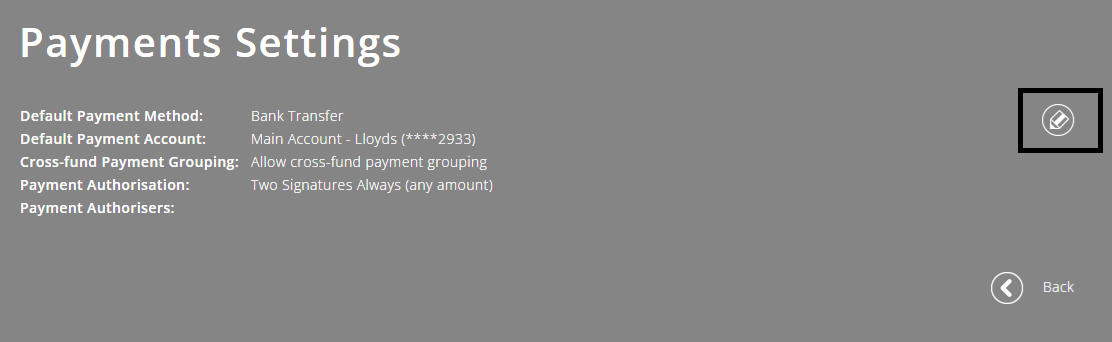
Where you have payments to make to the same payee, but you want to make the payments from different bank accounts, in System Settings > Payments Settings you will need to set cross-fund payment grouping to 'prevent'. To do this:
-
on the right-hand side of the Payments Settings screen, click the 'Edit' button (pencil icon)
-
in the Cross-fund Payment Grouping section of the 'Edit Payments Settings' pop-up, select 'Prevent cross-fund payment grouping', then click 'Submit'.
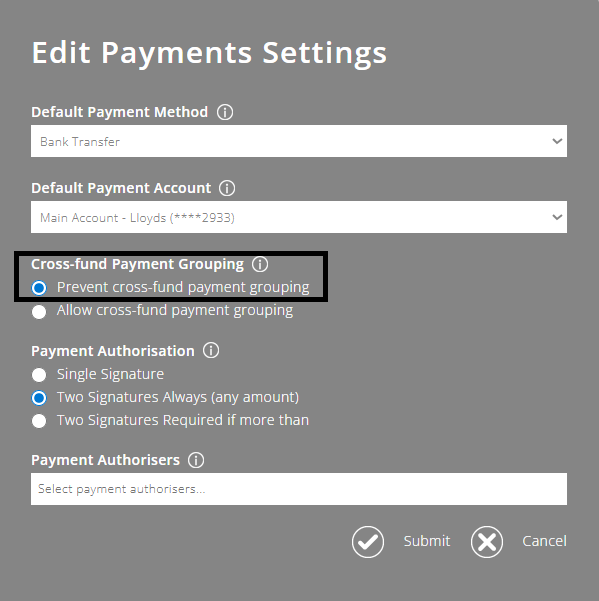


This will prevent the grouping of payments for payees where the various expense payments relate to different funds.
Learn more here: What is Cross-Fund Payment Grouping?
From a fund accounting perspective, having a separate bank account for each fund is not necessary. Read this blog article to learn more: Should restricted funds be in a separate bank account?
To help you better understand the Payments module as a whole, please visit the module overview page here.